Discover how plumbing is installed for an inground pool, including key components such as actuators, skimmers, waterfalls, and an in-floor cleaning system. Learn the process step by step.
| Component | Function |
|---|---|
| Actuator | Controls water flow to various pool features. |
| Skimmer | Removes floating debris from the pool surface. |
| Main Drain | Helps circulate water from the bottom of the pool. |
| Waterfall & Bubbler | Enhance pool aesthetics and circulation. |
Proper plumbing is essential for maintaining a functional and efficient inground pool. From actuators to skimmers, each component plays a crucial role in water circulation and pool maintenance.
If you're building a pool, understanding the plumbing process will help you appreciate the complexity of the installation and ensure your system runs smoothly for years to come.
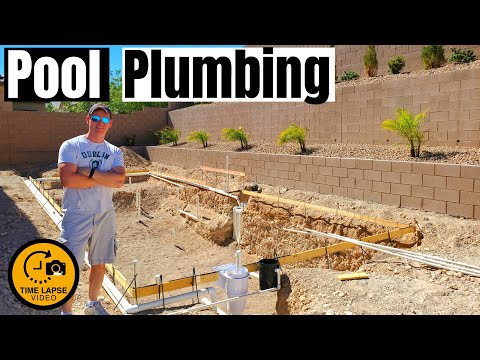
and the excavation is done now it's time for plumbing so first thing is they delivered all the pvc pipe then with spray paint they marked locations of the pipes next is the plumbing for the pool the first thing to install is the actuator the three main features for our pool is an eight foot shear waterfall bubbler and an in-ground floor cleaning system from what i can see most of the plumbing if not all the plumbing goes through the actuator so this is the first time i've actually seen this being done what they do is they heat the pvc pipe up with a blow torch and once it's hot enough it becomes like spaghetti and you can shape it or mold it any way you want to and once it's in the shape you desire pour water on top of it to harden it back up so we have a bunch of complicated pvc pipes running everywhere i do not pretend to understand how this all works but it looks amazing and i have a ton of respect for these plumbers they did a great job so once the actuator was installed they began running pvc pipes throughout the pool like i said before all these pvc pipes connect to the actuator and this is the skimmer install [Music] once they're finished laying the pipes they cover them with sand i'm not really sure why but that's what they do [Music] and here's that blowtorch again i find it pretty cool because you want to get hot enough but you don't want to burn the material and this connection here is the drain for the bottom of the pool and i notice with all these connections for these drains they make sure it's level [Music] and more sand to cover the pipes with [Music] [Music] so the plumber on the left looks like he is connecting the pipes for the waterfall this pipe also connects to the bubbler it's on the same pump so okay the plumbing for the pool is all done all pipes are covered with sand and all the pvc pipes are capped on top the pool equipment will be on the side of our house they had to bring a machine in to dig the trench for the piping and they hit an irrigation line as you can see all the water is going everywhere so they brought in this smaller excavator to dig a trench from the pool all the way to the pool equipment which is on the side of the house the trench had to be wide enough to allow for six pvc pipes to be laid down flat here's where the pool equipment is on the side of the house and those six pvc pipes run to the pool [Music] and once again i want to thank you guys for watching and remember if you like these videos give a thumbs up and share it [Music] if you love them hit subscribe it's free you

Welcome to another video from the Ultimate Tech Hub. This video is our Pool Plumbing Installation which is part of our Backyard ...

On this episode of The Ultimate Tech Hub, we will show you where the coax cable goes in your house. Many viewers and ...

This is the "Easy Ethernet Wall Jack Installation" that uses a 45-degree Cat6 Keystone Jack from SatMaximum. These 45-degree ...

The iDock C20 KVM switch from AV Access. This video will show you how to Connect 2 PCs To 1 Monitor with 1 Mouse ...

Watch this Amazing $100000 Pool Construction and backyard time-lapse! This is our EPIC Two Year Timelapse in 18 Minutes!

Welcome back to the Ultimate Tech Hub. Today is a special episode on our Youtube channel. We are building a beautiful custom ...